
Four step workflow for uploading images
Login to Learn > Upload your File> Release Rights > Describe file Details
I have a picture of the Llandaff Oratory It’s the little church at the top of the pass named after Frans Van Reenen. I’d like to add this photo to the Llandaff Oratory Wikipedia page.
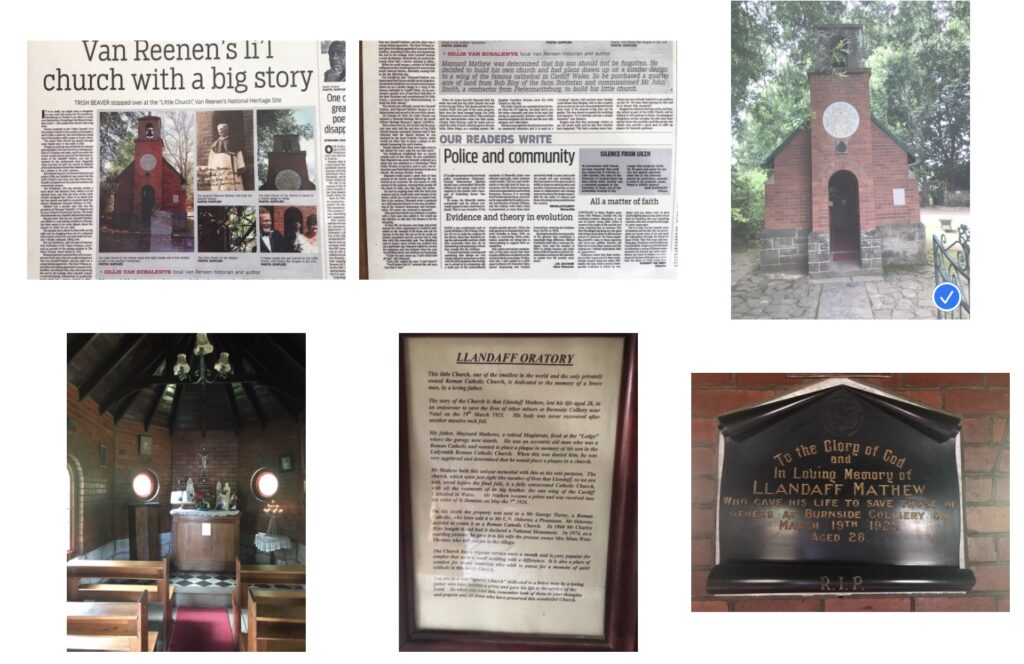
My task – to upload the image to Wikimedia Commons. I’ve used the four phases found in the Upload Wizard.
- Learn
- Upload
- Release Rights
- Describe
1) Login to Learn (about sharing work openly with licenses)
A person who creates a photo, owns the copyright to the photograph. The photo copyright could be given away, or sold, under specific conditions. These terms are set by a legal document known as a license that specifies the nature of the agreement. A free license simply means the creator permits others to use his or her copyrighted photo without asking explicitly for permission. Open licenses make it easier to share pics with others.
2) Upload your File from your device
Select your photo. High quality images are better. You might want to size them consistently. Below you will see a picture I took of the Littlest Church at Van Reenen. The tick shows that I selected it.
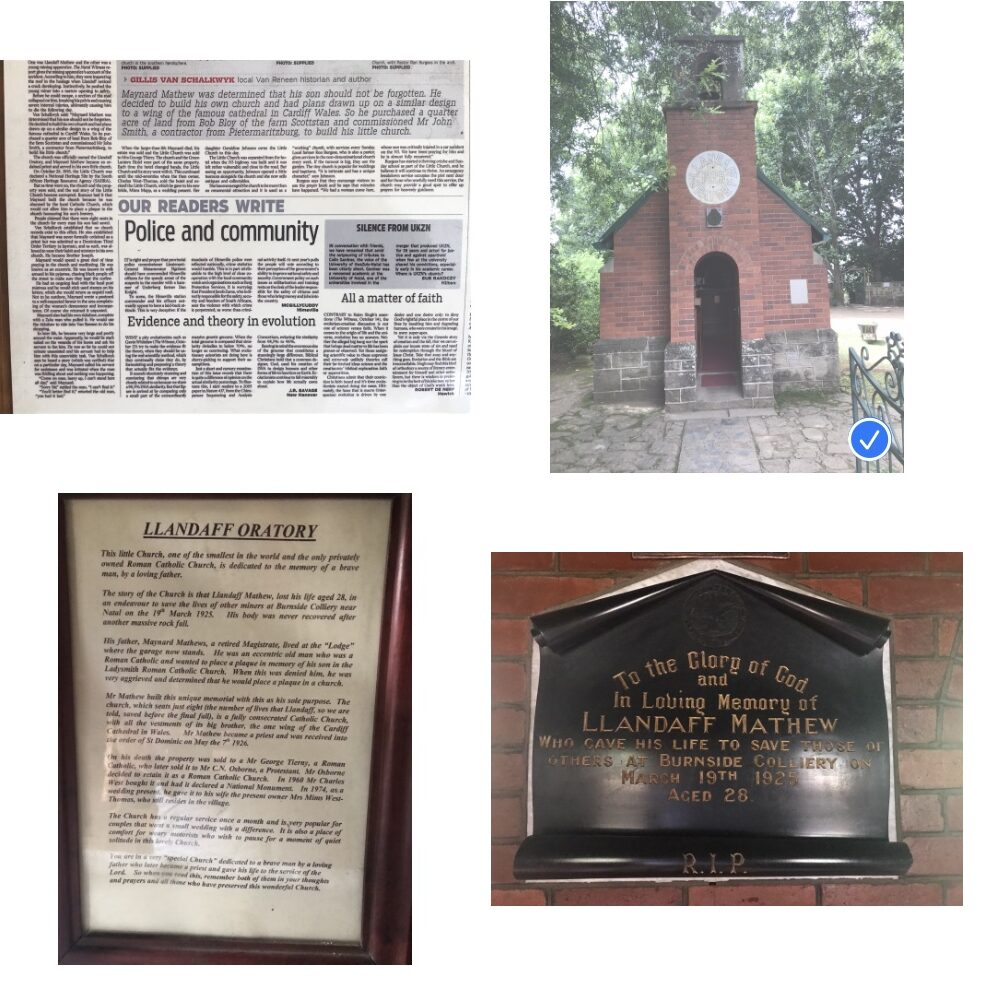
Go to the Upload Wizard. Click the blue button “UPLOAD“.
The photo might take some time to upload.”

3) Release Rights are all about open licensing to the Commons.
- You could set your release rights automatically – see https://commons.wikimedia.org/wiki/Special:Preferences
- Otherwise you will be reminded about ownership of the image. Choose from these two options.
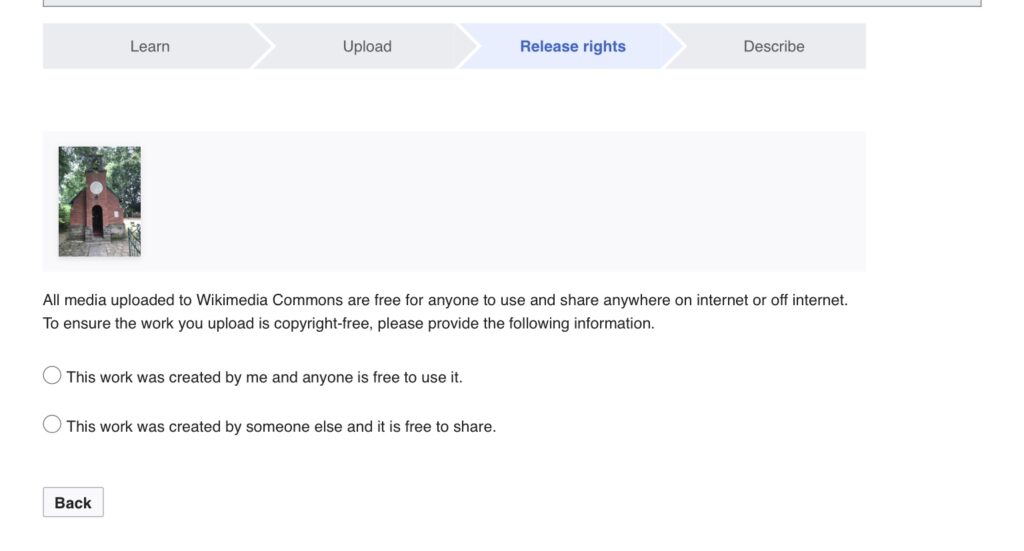
Consider an open licence? I prefer “CC BY” ensures you get credited whenever the photo’s reused. If you comfortable with code, you could try these templates with option 4 (of course you have to modify).
{{attribution|User:Derek J Moore|Weblearning}}
{{self|cc-by-4.0}}
4) Describe file Details and add extra data
This part can skipped. But metadata is very useful later on, when you have many images.
Choose a filename. I keep it short (and try to ensure that I have got the spelling right)
Add a caption. The writing below an image is the caption, it places the image in a context. You have 255-characters to write the description. You might want to add a vernacular caption too?
Published date. Select the date when the image was first published
Describe Further. Add additional information. This is optional, but helpful for others
Insert a Wikidata item. There should be a main subject visible in the photo. Locate the Wikidata number and add structured data
Add a specific category. When working with a batch of photos you might want to add a category or use an existing one.
Location. You could add the geo-coordinates (or they might appear automatically)
MORE Additional information This is a hidden field. You might be uploading a map from open street maps. They you’d use the template {{OpenStreetMap}}
Post and Confirm. You are ready to finalise your post. All that has been submitted can be checked and corrected
Next: Adding
Advanced: Uploading files with OpenRefine
Adapted from ten steps to put photos on Wikimedia Commons (adapted from Commons Workflow handout by Mike Dickison, CC BY 4.0 via Wikimedia Commons)